Rolfer, Dancer, Teacher

Posts tagged ‘swing dance’

An Open Letter to the Triangle Swing Dance Scene re: the Continuation of RDU Rent Party

Dear friends and fellow dancers,

I am writing to you today to seek your input and guidance on the future of RDU Rent Party dance events.  Laura Windley and I have been running these live music dances now for several years now to sometimes great success.  Lately, however, we have seen smaller numbers of dancers showing up at Rent Party events and smaller amounts showing up in the hat box.  This lull is starting to make it very hard to pay musicians a reasonable wage and as such we are currently considering whether or not to put Rent Party on hiatus.  We have always thought of RDU Rent Party as a community event and so we felt it best to offer an open discussion with the Triangle Swing Dance community before making any decisive moves on this subject.

A little back story

For those not familiar with it, RDU Rent Party exists as a labor of love for myself and Laura, we host bands for a pay-what-you-can dance, I pay for the space rental out of my own pocket, and all money collected is given to the band.  We frequently pick up travelling bands on tour because we can offer them an extra gig on an off night (typically Thursdays).  Laura and I started this at a time when the local swing dance society (TSDS) was in a financial crisis and typically hiring cheap bands over what we would consider to be good bands.  In the past year or two TSDS has started hiring what we think are more exciting bands and is back on solid financial ground and we have seen a slow decline in RP numbers in the meantime.  Whether or not these are related is questionable but it does leave us questioning if RDU Rent Party still has a role to play in the swing scene as it stands.

If you want a bit more backstory, you can check out this post I wrote a while back on the history of RP.

RP’s place as we see it

So approximately speaking, this is where we have seen the place of Rent Party dances in our local scene in past:

  • Rent Party has been able to bring in bands that often would not be here on a weekend, meaning we wouldn’t get to hear them play or dance to them unless they happened to get a bar gig of some sort.  Because TSDS only hosts Saturday night dances, we would miss many of these bands on tour because they are usually already booked for weekend gigs at exchanges and workshops.
  • Rent Party has at times been able to work with bands who are otherwise prohibitively expensive because we can work with them on an off night.
  • Rent Party has been able to serve as a testing ground for several bands which the local swing dance society would be hesitant to try untested.  Several bands like Bumper Jacksons, Clark Stern, and Hot Club of North Carolina have since gone on to play to larger crowds at our local Saturday night dances.  We also put on the first ever dance played by the now infamous Mint Julep Jazz Band.
  • Rent Party has kept a place for live music in the center of the Triangle area where dancers can still easily mix and pull from Raleigh, Durham, and Chapel Hill.  At this point, TSDS has only been able to find suitable venues in the far West end of the Triangle.
  • And finally, Rent Party remains able to host dances that simply would not fly at TSDS dances.  Having solo piano badass, Ethan Uslan, play alone for a packed house of dancers or Soul DJ, Ryan Thomas, spin a whole night of vintage vinyl, for instance would not happen anywhere else in the Triangle.

The situation as it stands

In the last year or so we have seen RP numbers drop in a not-insignificant fashion.  I would estimate we are seeing 2/3 of the numbers at the door and close to half of the money in the hat box meaning not only are fewer people showing up, but they are also paying in less.  While I’m happy to lose money on the event and put on an awesome show, the host in me can’t really continue to be excited at the prospect of underpaying the musicians we offer gigs to.  RP has slowly become a more stressful experience when we once easily paid 7 or 8 people a solid wage and now struggle to pay 4 decently.  Not only that, but it hinders our ability to bring in bands when the range we can reasonably promise them continues to shrink.  At the moment we have several bands from Philly and NYC who have asked to play but for whom the current RP numbers aren’t worthwhile.

We need your input

We put on RP for our own enjoyment and hopefully for the good of the community.  Laura and I are happy to continue to invest in Rent Party, and we think bands are happy to invest their time in it as well, so long as the community can match that energy.  We are also happy to let it rest and focus our energies elsewhere if RDU Rent Party has run its course.  But we don’t want to make this decision alone, so please let us know what you think, either in the comments or by emailing me.  If you want to see RDU Rent Party continue or if you have ideas on how we could make it more enticing for you both to show up and to show the bands some love, we are happy to hear them.  Or if you feel like in a sea of good options lately, that RP just doesn’t draw you like it used to and we should take a break, we’d love to hear that too.

Regardless, we are grateful for the approximately 3-4 year run that we have had, to all the dancers who made it possible, to all the bands who tried this crazy idea with us, and for all the amazing experiences it has allowed us to have.  Whatever decision we end up making, know that we are extremely grateful for the good times and happy to make our future endeavors whatever will serve the dance and the scene best.

Cheers,
Jason & Laura

Following as Active Choice: An Experiment in Wording

A few years ago at The Experiment I had a conversation with a follow who said that while she felt like an equal partner in her marriage, she did not feel like an equal partner in dancing.  My experience dancing with a significant number of follows is that they view the dance as if their part is somehow less important or requires less attention than leading does.  While I have been aware of this issue for years, it has recently occurred to me that some of this attitude could result from the passive language that is often used in teaching follows, especially at early stages.

Over the last few months I have been working intently to  rewrite my teaching language to clearly present following as a role with equal importance in the dance.  I have found that a few key wording changes have produced very different results in the way student followers dance, at least in the short time that I have been experimenting with this.  While I’m aware that these results are by no means a clear indicator of long-term success, given the current national online conversation about gender relations in the swing scene, it seems beneficial to share what I have found so far.  Given the current experimental phase, I figured I would write this up like a high school chemistry experiment rather than a lecture.

I’d also like to give a quick thanks to everyone who has helped me work through how to talk about this, and to all the leads and follows who’ve given me feedback to help me refine ideas to this stage.

Examining Effects of Active Choice In Following

Introduction

Following in dance is often presented to beginners as a purely reactive role.  Analogies for following often involve passive objects on frictionless surfaces, and follows are told to “wait for the lead.”  More attention is given to leads in most classes and follows often receive praise for doing things as expected rather than for following what was actually lead.  After months or years of working to become a “good follow,” follows may suddenly be thrown the idea that they should start adding creatively to the dance, which can seem counter to the skills they have spent their early dance career developing.  It can be a treacherous cocktail of mixed messages about doing what you’re told while being creative and matching the lead, yet also being yourself.

But what happens if we teach following as a “choice” rather than a “should”?  Instead of presenting following as doing what the lead says, what if we present it as listening for the lead as a suggestion or invitation and choosing how to respond?  By altering language and presenting the role as equally capable of influencing the dynamic of the partnership (rather than exclusively reacting to the movements and signals of the lead) we hope to see a rise in confidence of the follows as well as a greater sense of “team” in dance couples.

Methods/Experiments

In teaching private lessons, both experienced and new follows were presented with the idea that following is a choice.  Of particular note is one follower with several years experience who, while commanding in her daily life, has always seemed to lack confidence in her dancing.  This student was asked to think of following as a matter of interpreting the lead and choosing to execute her interpretation as explicitly as she wanted (i.e., purely following), rather than thinking of following as doing it “right” or “wrong.”

In group classes, focus was placed on the follow’s ability to control their own side of the connection (i.e., their own arm) and their ability to suggest ideas in connection or pulse simply by altering their own movements.  Time was spent asking the leads to dance with no pulse or off time and for follows to exhibit strong pulse and rhythm to influence the lead into matching, bringing the couple on beat together.  Followers were presented with the idea of being able to use stretch in frame to generate energy for their own movement, and both lead and follows were taught that they could stretch their own frame individually and as a means of communication to their partner.

Test wordings and exercises were used over approximately 20 follows in 3 months of classes.

Results

In response to this style of teaching, follows have generally been very appreciative of the use of active wording.  They have also advanced faster and appear to be actively engaged in trying to understand how to follow movements rather than asking “what am I supposed to do?”

Follows have exhibited greater flow of motion and more willingness to put their own energy into movement, plus greater trust of support from the lead.  Multiple follows are also exhibiting spontaneous creativity in following and footwork within the first few months of learning to dance.

Dancesplaining has been nearly non-existent in the classroom setting during this experiment.  There has been more positive partner interaction in rotation, such as discussing how to make a move work rather than assigning blame if it doesn’t.

The most dramatic result occurred with a private-lesson student.  Immediately after introducing the idea of interpretation and choice, the follow’s movements became significantly more confident (or actually read as confident for first time that we ever observed); movements became fluid, and she began to smile and have fun.

graph

Conclusions

Presenting following as an active interpretation and choice to respond appears to help follows feel more confident in their dancing and less nervous about doing it “right.”  They also appear more comfortable with the idea of shared responsibility for creative aspects of the dance.  Preliminary results seem to indicate that they are also more interested in continuing to learn and improve than in past classes which used more passive wording.

This style of wording also appears to reduce pressure on the leads by giving them time to integrate their own material while follows work on new material, and by presenting the dance as a shared creation rather than content purely dependent on the lead.  Leads are also able to focus attention in different places when follows are empowered to share responsibility for concepts like pulse and rhythm.

Overall, dances in this experimental mode have exhibited more teamwork and less “2 people holding hands and dancing around each other.”  Both roles seem more excited, less fearful of each other, and less worried about judgement.  Students appear to be approaching the dance and learning as a team rather than as isolated individuals.

While it remains to be seen how this will affect dancing in the longer term, preliminary findings show a great deal of promise.  Feedback from each side has been positive, both in terms of how students feel about the dance and how they feel about the instruction.

In Defense of the Rotator Cuff

This post is being written at the request of a lovely Aussie follower who has suffered multiple rotator cuff tears in the course of her dance life. While not all dancers suffer from rotator tears, it’s a fair bet that almost every dance will run afoul of their shoulders at some point. The following ideas should help you minimize your chances of injury in those moments of potential crisis. Note that while I will give some specific lead or follow examples, all of these should hold mechanically true for both leading and following.

A quick note before anyone jumps up to tell me that their instructor told them to do it differently, I’m speaking here from a biomechanical and injury-proofing standpoint, not an aesthetic or stylistic standpoint. I personally find that solid body mechanics tends to translate to great aesthetics for me, and I try to base my dancing first and foremost on things that I think will allow me to keep dancing for the rest of my life. These are the best safe & effectively connecting body mechanics that I have come up with in 11 years and if I develop or encounter a better idea, I’ll definitely post about it.

Anatomy Time!

rotator cuffThe rotator cuff is the group of muscles connecting the top of the upper arm bone (humerus) to the shoulder blade (scapula).  The reason these are important is that the shoulder blade is a relatively mobile and therefore unstable joint. The surface of the shoulder joint (glenoid fossa) is essentially a very shallow bowl that has been overfilled with the head of the humerus. This makes the joint very mobile, but also vulnerable to sliding around or out of the socket (one of the reasons shoulder dislocations are far more common than, say, hip dislocations). The muscles of the rotator cuff are all oriented closely around the joint to rotate the humerus in the joint, provide stability, and protect against injuries like dislocations.

Dancing Based on Natural Angle

Based partly on the rigors of modern life, most of us have become habituated to some less-than-natural positions for our arms. The arms-straight-ahead position that most of us spend a lot of time in (driving, typing, etc.) rolls the shoulder in a way that compresses the front of the joint and, over time, tends to make the shoulders stick forward even when our arms are at our side. Many people, either by instruction or habit from daily life, learn to dance with their arms straight in front of them, reinforcing this compression, and putting the shoulder in an unstable position to deal with strong pushes or pulls. I feel that opening the shoulder up to a neutral and balanced position makes it both more stable and far more functional at handling the demands of swing dancing.

To reacquaint yourself with this position, first hold your arms up around belly button height then slowly move them from reaching straight ahead to straight out to the side. As you swing through this range, you should notice that the level of tension in the shoulder lessens as you move towards the middle of the arc, hits a point of minimal tension, and then the tension starts to increase as you continue towards the end of the arc. You should also notice the position of tensions shift as you pass to either side of that middle point. This point of minimal tension is what I refer to in classes as the natural angle of the shoulder. It is the angle at which the rotator cuff is most relaxed and therefore most able to react to various forces. The exact angle varies from person to person but typically falls somewhere between 30-60 degrees from straight out front and places the hands in a position wider than the shoulders.

When I’m dancing, part of protecting my shoulder is that I consider this angle to be home base for how I orient to my partner. I remember as a newbie being taught things like spotlighting or to “square off” to my partner and it always felt a bit forced. I have found orienting myself to my partner based on the natural angle of my shoulder to be far more connected and comfortable and consequently safer for my shoulder. My hand and arm move to follow or lead my partner and I adjust the angle of my body to keep my shoulder in an open, relaxed and ready position. It can be counter-intuitive to the way many of us orient to our hands, but once you get used to it, it should make a lot of sense for your body.

Chest Up, Shoulders Down

The other typical position that can compromise the rotator cuff is the overhead lift of leading and following turns. Many dancers don’t just bring the hand and forearm up when they turn, they also raise the shoulder blade. Lifting the shoulder blade off the ribs puts the shoulder in a vulnerable position by disconnecting it from the support of the ribs. Without the support of the ribs, it becomes much easier for a pull at the wrong time to bend the shoulder into an angle that will injure it. I have found the next two concepts to be exceptionally helpful in keeping the shoulder in a safe position during spins and turns.

Paint the Fence (aka NO ROTATION)

???????????????????????????????????????????????????????????????????????A common stressor that many dancers put on their shoulder is trying to rotate it out as they lift. While I realize it is a fairly common cue, I find the “checking your watch” method of leading turns does not make kinesthetic sense to me. Rotating the arm to look at your wrist forces the elbow above the shoulder blade which then pulls the shoulder up with it. The more the elbow flairs away from the body, the more the shoulder separates from the ribs, reducing both stability and connection.

A far more effective method of raising the arm comes in an approximation of Mr. Miyagi’s paint the fence exercise from The Karate Kid (the original, not the remake). Keeping with the natural angle of the shoulder, the motion of the arm is basically just “Uuuup…, Dooown…” and the torso moves to create the turn.

[youtube http://www.youtube.com/watch?v=R37pbIySnjg]

Unlike Daniel-san, for dance purposes you’ll want to let your elbow be loose, relaxed, and weighted so that it stays low as your arm comes up. But notice in the motion of the movie that this is a whole body motion. You can see the muscles of the chest flex and relax with the motion and you should be able to feel them activating. If you try to same “look at your watch” motion, and feel your pecs, you’ll notice they have almost no activation. Keeping the arm rising and falling and making adjustments with the torso rather than the shoulder rotation will put you in a much safer position and typically keep you more connected to your partner (which also helps you be safer). By maintaining the connection of the arm to the torso, you can also effectively lead turns by initiating small rotations from the chest and spine rather than large motions from the arm.

Scapula as Counterweight (or Turns and Trebuchets)

The other issue I often see putting shoulders in harm’s way is the tendency to think that everything needs to go up. People become so focused on their hand that they forget there is a wrist, elbow, shoulder, and ultimately, spine attached to that hand. So if your only awareness is the hand needs to go up, everything else in that chain tends to go with it. Again, the shoulder rises and you are suddenly in the vulnerable position of having your hand above your head with only your rotator cuff actively holding the shoulder in the socket.

trebuchetWhat has served me best is to bring an awareness of my shoulder blade and to think of it as a counterweight to the arm, similar to but not quite as unbalanced as the counterweighting found in a trebuchet. When I want my arm to rise, I don’t think about taking my hand up, but rather, I think about initiating by allowing the scapula to slide down (inferior) my back and away from my head. This serves to stabilize the shoulder in several ways. One, it insures that my arm does not come up without my scapula being solidly in touch with my ribs and it additionally eases some of the effort of lifting my arm, meaning my hand goes up with less muscular effort and I have more freedom to adjust in case of emergency. One of the easiest ways to experience this is to stand with your back against the wall and try both lifting your shoulder blade as your arm rises or letting it slide downward as your arm rises. With the downward slide, you should feel more of the engagement in your chest and back and your arm should feel much lighter and floaty than when you lift the shoulder blade with it.

incline_pulleyThe counterweight idea is not only useful for turns, but can also be applied to protecting the shoulder from collapsing forward when stretching out in swingouts, tossouts, rocksteps, etc. In a stretch where the arm is not going to come up above shoulder level, think of the shoulder blade as a counterweight to the front of the chest and allow the chest to rise and open as the shoulder blade descends. In the inclined pulley illustration, think of M as the shoulder blade and m as the arm. So long as M is weighty enough, it will resist being pulled up and over the top by m. But if the force of m wins out, then the shoulder blade (M) will be pulled up over the top of the pulley and it will all tumble down the slope. By letting your shoulder blade remain weighty when stretching (at a natural angle) it will prevent a lot of potential strains and sprains that can occur from collapsing and hyper-extending the shoulder.

Keep it Personal

There is no one right way to do this. There is a great deal more variability in human anatomy that a typical textbook will not show and as such, there is a great deal of variability in function as well. The safest angle for one dancer may feel very unstable for another and so on. The more you can create ease in your body, the more ready your muscles will be to keep itself in safe and comfortable positioning. Similar to the non-Newtonian frame concept, the more you are in a fluid, rather than rigid, state to start, the more readily you will be able to react both to potential threats and to communications from your partner. In addition, the safer your body position feels, the more it will free up your attention to try more awesome things. Use the above as suggestions to play with your own angles and ways of conceiving of motion and use whether it feels more tense or less tense as the metric for more vulnerable or less vulnerable.

The Power of Reflective Practice

Lodge_cameraIt’s an idea many of us have heard or even expressed ourselves in learning to dance: it’s important to tape yourself. While it’s an easy concept to understand, I have never seen it illustrated so clearly as I have recently with a couple of new students. Working with them has been a great education for me in seeing how powerful the idea of taping yourself can be.

Dr. Lodge McCammon and soon-to-be-Dr. Brandy Parker joined my classes at The Lindy Lab about 3 months ago. Lodge is an educational expert who helps teachers flip their classroom and introduce the idea of Reflective Practice to student’s learning skills. The essential idea is to tape yourself performing the skill or talking about the material you are studying and then review the tape of yourself to connect with your own progress.

3 Weeks

Lodge and Brandy started with one Lindy class on their first week and were pretty much hooked from the get-go. Lodge has described it to me as finding something he feels like he should have been doing all his life. After the first week, they upgraded to an unlimited class package and were practicing, like most beginning dance students, based on feel alone and occasionally going dance.  After 3 weeks of that and a total of 13.5 classroom hours, they decided to tape themselves for the first time and posted this video:

It was after this first taping that they realized that Lodge’s work with flipped classrooms and reflective practice could be applied to their dancing as well.  Following the taping of this first video, they began spending more of their practice time taping and reviewing their dancing.  Lodge has said that this taping was actually a great tool for building confidence as he found his taped dancing looked a lot better than he would have expected it to.

6 Weeks

A few more weeks passed and we were into the Christmas break.  Lodge and Brandy were stoked to keep learning so we switched to doing a couple of private lessons to bridge the gap until January classes.  At their request, we taped the entirety of each private lesson and Lodge and Brandy would review the lesson later, practice a bit, then send me a video talking about what they were working on before the next private lesson (Click here for an example recap video).  They have both commented that these videos were extremely helpful, noting that they often picked up some major concepts from rewatching the videos that had not landed for them during the lessons.

After a few more weeks of dancing and about 5 hours of private lessons, Lodge and Brandy recorded and posted the following video, dancing to a tune they wrote and recorded by themselves.

For a difference of 3 weeks, the shifts in fluidity and energy are pretty impressive.  They also changed where they were dancing because we figured out that Lodge was originally ducking his head a lot to avoid hitting the ceiling fan in the middle of the room.  My favorite thing about this video is that at 6 weeks, Lodge and Brandy’s own creativity and personality are already coming out in their dancing.  The choreographed break away parts are things I hadn’t taught them, so it’s awesome to see them already starting to show off their own ideas.

At this point, Lodge and Brandy asked me to add that teaching style has had a lot to do with their ability to integrate reflective practice into the growth of their dancing.  In the past year or so, I have focused classes on first principles of motion with an emphasis on encouraging creativity, musicality, and general experimentation with one’s own motion.  Lodge and Brandy both feel that emphasis on creativity and personal experimentation have helped a great deal in inspiring them to move forward in their dancing and to try mixing in their own educational models.

10 Weeks

January group classes were a bit more Charleston heavy and Lodge and Brandy took everything again.  They also had one extra private lesson with me and one from Nelle Cherry while she was in town.  At this point, they’d taken on a lot of information and were spending more time on integrating, so towards the end of 10 weeks they were starting to slow down on classes and ease up on practicing a bit.  At about the 10 week mark, they recorded another original song and posted this video:

I think it’s best to let the last video speak for itself.  Especially in comparison from Week 3 to Week 10, the difference is really impressive.  Working with Lodge and Brandy has inspired me to start taping myself again and to get a camcorder setup for the dance studio to make this kind of practicing available to other students.  If you are interested in learning more about Lodge’s work on education and practice, check him out on facebook at FIZZ Education.

When “Relax” Doesn’t Work (and 3 simple things that do)

tight stone fist

“relax”

“Relax”

“RELAX”

I cringed a little watching this exchange between a massage therapist and a client. The massage therapist was trying to get her client to release tension in her arm. The woman on the table was having trouble relaxing and the massage therapist was becoming frustrated by the client’s lack of response. The client, not too surprisingly, seemed less and less relaxed as the therapist became louder and more insistent.

I have seen similar situations play out in dance classes where well-meaning instructors have created traumatic situations for students by pushing them to relax. I have talked to students who were reduced to tears after a private lesson where they were just told over and over to relax. And I recently had a student who really needed to relax thank me for finding more active release-oriented ways to cue her because a previous ballroom teacher had essentially beaten her over the head with the word “relax” to the point where she hated/feared hearing it.

“Relax” can be an extremely difficult instruction to execute. It seems a great many instructors, students, and people in general don’t have alternative strategies to try when “relax” isn’t effective. So when “relax” doesn’t work, they don’t have a backup wording and just keep saying the same thing that didn’t work the first time. Then they go on repeating “relax” like a mantra until they give up or manage or contort themselves into something that looks close enough that they can move on.

What makes “relax” so hard?

For starters, context. People typically get told to relax in situations where they are already tense, meaning they are under some sort of stress or sense of danger. Telling someone to relax in such a situation is essentially asking them to turn off a defense mechanism when they feel threatened. Frequently, people who are tense because of some fear of judgement end up tensing even more when told to relax because they fear being unable to comply and being judged further.

Relax is also a fairly complex concept, when you think about it. Not only does it involve a change in physical state, but also a mental/emotional shift. And for relaxing to make sense to your nervous system, you need to view your current surroundings as non-threatening. If any of these tensions are habitual, it can even be difficult to tell that you are tense in the first place. With all these factors involved, relax becomes more a state of being than a simple action.

Many people seem to conceptualize relax as the absence of doing something. In the US, the tendency to fill our lives with doing things can make the idea of relaxing seem to equal doing nothing or even being viewed as a negative. Rather than viewing relaxation as a lack of doing, it can be far more productive to approach it as an active releasing of tension. The following few ways can help you to physically and mentally achieve relaxation more effectively than just thinking “relax.”

Breathe

breathelungsOne of my first cues anytime I find myself tense is to extend my breathing. Taking a longer breath, and particularly a longer exhale, activates the relaxation response. Under the sort of duress that causes tension, most of us will shorten or even hold our breath, reinforcing the tension. Deep, slow breathing helps to settle the nervous system and bring it back to a state of ease, leading the muscles to relax without direct, conscious effort.

You can also direct breath towards particular areas that need help relaxing. Shoulder tense? Try focusing on the area in your chest near that shoulder and imagine directing your breath to it. The expansion of the lungs is a great way to passively expand muscle groups and give them more space to settle into more comfortable and relaxed positions.

Think Down

The body responds much better to simple directional ideas than it does to complex concepts like “relax.” The end goal of relaxing can often be achieved by thinking about letting the arms (or whatever body part) sink down.

melting_womanIn many dance contexts I’ve seen teachers repeatedly asking students to relax their arms, often with minimal to moderate success. Often, this arm tension is based on the idea that someone needs to hold their own arms up. So a great deal of tension is a result of fighting gravity to keep the arms at some specific height. By thinking about allowing the arms to sink down, the body can surrender to the effects of gravity and work with it, rather than constantly fighting it. I often use the idea of melting like candle wax to enhance this effect in relaxing. Because a relaxed arm will more effectively transfer motion, this sort of release is integral to creating natural connection in dancing.

ghostbusters-floating-dana
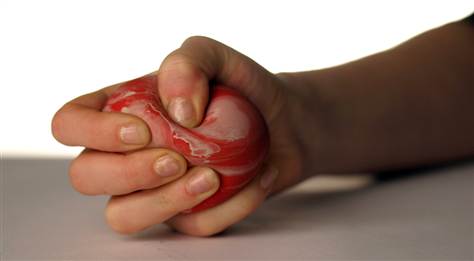
I see the same effect on my Rolfing® table where many people’s bodies tense away from the table almost as if they could levitate themselves by sheer force of will. When I prompt them to recognize that the table can support their weight and to let themselves sink into that support, their bodies relax and their mental state follows suit shortly after. In standing, a similar effect is achievable by becoming aware of the bones in your body and allowing weight to carry through bones rather than be held up by muscle.

Tense & Release

One of the more counter-intuitive moves for relaxation is to tense up first. Most of us, when told to relax, will aim to go directly towards some sort of relaxing attempt. stress ballHowever, it can end up more effective to tense muscles first, hold that tension for a few seconds, and then allow them to relax. In essence, taking yourself into greater tension allows for a better release.

Because many of us carry constant tensions, it can be easy for the brain to begin filtering out these sensations. I often hear people remark that they had no idea they were tense in so many places. By creating a conscious tension in the muscle first, the difference between tense and relaxed can become more apparent, which helps you feel yourself relax. This technique is also used by some physical therapists, terming it Progressive Muscle Relaxation, to treat general anxiety issues.

The 3 ideas above are just starter ideas, feel free to modify them or come up with your own. The more tools you have, the more you can help someone else relax or have options to try when someone tells you to relax.

In any case, keep in mind that attempting to produce a relaxed state involves physical, mental, and emotional aspects. Shifting any one aspect can help to shift the whole.  So when you are having trouble relaxing, focus on a simpler version of it, releasing a part of the body, slowing your breathing, calming your thoughts, instead of trying to do everything at once. And just like working out a muscle, the more you work with these ideas, the stronger they become and the more readily they will help you to achieve relaxation.

Swing Dance Frame as Non-Newtonian Fluid

As a dancer and Rolfer®, I find myself constantly searching for simple, elegant ways to describe complex concepts in movement.  One such concept that often seems difficult to describe in swing dancing is frame.  Most often I hear overly simplified images like “Barbie doll arms,” or models like “relaxed but with tone” that involve complex ideas and can be confusing.  So in my search for a singular concept to encompass all these pieces, I have found myself over the past year drawing on a concept I first encountered during my training to be a Rolfer.

The way I currently approach swing dancing frame is that it behaves like a non-Newtonian fluid.  Since most people are not immediately familiar with what that means, let’s start with a definition.

A non-Newtonian fluid is a liquid which has a variable viscosity depending upon circumstances.  In simple terms, this means that the substance behaves like a liquid under some circumstances and more like a solid under other circumstances.  The common example that most of us will be familiar with is ketchup.  Glass bottled ketchup will tend to behave more like a solid when you first turn the bottle to pour it, but once you start it flowing by shaking it or poking it with a knife, it will continue to flow smoothly.  For the purposes of describing frame, I will be using a different non-Newtonian fluid by the Dr. Seuss inspired name Oobleck.

Oobleck is a soupy suspension of cornstarch in water that exhibits shear thickening, meaning that under pressure the fluid behaves temporarily like a solid and then returns to a liquid state when the pressure releases. So with a tub of Oobleck, if you were to say, punch it, you will essentially bounce off as though the material is a rubbery solid, whereas setting a hand on it and simply sinking, the Oobleck will remain in a liquid state.  This effect often gets used in science shows as a way to “walk on water” as you can see below.

This change in viscosity occurs due to what one scientist refers to as the “Three Stooges Effect” which is to say that under pressure, the molecules in the Oobleck are trying to move too fast through a space together and get stuck, as in when all three Stooges attempt to walk through a door at the same time.  So the material changes it’s state in response to force, reactively instead of proactively.  It is this combination of fluidity and reactivity that, to me, makes it such an apt image for swing dance frame.

In a dance context, I use the idea of non-Newtonian fluid to influence any point of contact I am using with my partner.  When we are in a neutral state relative to each other, shoulders, arms, forearms, and hands remain in a relaxed fluid state.  But when our bodies move closer or further away from each other with a strong force, the arms react by acting more solidly to resist the change.  I don’t think about actively relaxing or tensing my arms with these changes, I think of them as constantly seeking a fluid state, but reacting under pressure to resist change when force is applied.  By doing so, my arms communicate the motion of my body relative to my partner.  Rather than being instruments of leading or following, when the arms behave like a non-Newtonian fluid, they simply become a way to transmit force from one body to another and can communicate equally from lead to follow or follow to lead.  And as an added benefit, it leaves my muscles feeling good after a dance instead of worn down by constant work to maintain a specific shape or create constant tension.

This is not to say that frame behaves this way at all times, I think there are always exceptions (and there is probably an exception to that) but this idea of non-Newtonian fluidity in frame is an underlying principle of how I think of frame in swing dancing.  Non-Newtonian fluid is, at this point, the best single image I have come up with encompass the use of both ease and tension in creating connected frame.

Note: If you want to try making your own Oobleck to get a feel for how this material behaves, simply combine 1 cup of water with 1.5 to 2 cups of cornstarch and mix thoroughly.

Tag Cloud